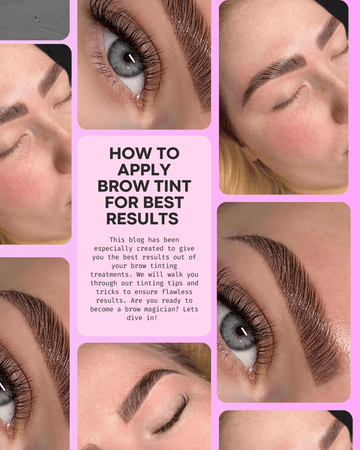
This blog has been especially created to give you the best results out of your brow tinting treatments. We will walk you through our tinting tips and tricks to ensure flawless results. Are you ready to become a brow magician? Lets dive in!
Sculpting the best brow shape is is essential in achieving flawless results. We have created the ultimate guide for brow artists to perfect their brow tint application, and brow tinting technique.
How to apply brow tint for the best results?
Step 1: Perfecting the prep. How to prepare for brow appointment?
Before the magic happens, perfect brow preparation is key. We want to begin with a perfect canvas, and do so with LASH V Brow Conditioning Cleanser. Follow with LASH V Brow Exfoliating Scrub to gently exfoliate and prepare the skin for your brow tinting service. Wave goodbye to impurities and oils and hello to softly cleansed skin. Both products are a must for adding a touch of luxury. If you want to perfect your brow services, using high quality products will elevate your clients experience and create a long lasting impression.
Step 2. Perfecting the palette. How to choose the correct brow tint shade?
You can achieve the perfect brow colour with our beautiful range of Brow and Lash Dye, Brow Stain and Hybrid Stain with Henna. All of our products are richly pigmented and available in a luxe range of shades. LASH V have created a formulation that is long lasting and bold. Start by looking at the natural hair colour. If your client has lighter hair, opt for a brow tint that is slightly darker than their hair colour. Skin tone also plays a huge role, cooler skin tones well with ashy shades and warmer skin looks best with warmer shades such as medium brown.
Step 3. Perfect your map. How to brow map? You will need: A white brow pencil, a mirror and a mascara wand. Firstly you want to begin were they eyebrow should start. Hold your pencil vertical down the side of the nose , and mark this point on the skin, showing were the brow will begin. You want to now determine were the arch will be. Pivot your brow pencil to cross the centre of the eye and again mark the skin, this will show were you will shape out the arch. Finally, you want to determine were the eyebrow shape will end. Simply pivot the pencil from the centre of the eye to the outer corner of the eye and this will show you were the brow shape will end. Simple connect the lines with your brow pencil and provide a clear outline for the perfect brow shape for your clients features.
Step 4: Perfect your solution: How to mix brow dye? Shake product bottle before use . Mix equal parts 1:1 of your brow tint to LASH V Developer 3% into a creamy solution using an angled brush. You can now fill in your perfect stencil and clean around the edges with a cotton bud. This will allow nice clean crisp edges. Its now time to let the magic happen. Depending on what product you have used to tint the brows, will distinguish how long to keep the formula on for. If you are using LASH V Brow and Lash Dye, we recommend 8-12 minutes depending on your clients desired look. Stains are left a little longer and can be left on for 25 minutes for a bold rich pigment. Once happy with your colour you can remove with a cotton pad.
Step 5: The grand finale: How to maintain the brows? No masterpiece is complete without the final touches. Aftercare is simply the happy ever after. Apply LASH V Brow Nourishing Oil to add hydration back into the brows and a luxurious end to the treatment. The perfect upsell for your client to look after their brows in between appointments and naturally promote hair growth so they can get the best out of each and every brow service.
With this ultimate guide of perfecting your brow application you are now fully equiped to slay your brow treatments with perfect brow shapes. With the best products, a pinch of artistry, and a lot of love, your clients will leave your studio with true works of art and will continue to do so. Its time to embrace the world of brow artistry and elevate your beauty game to the next level.


